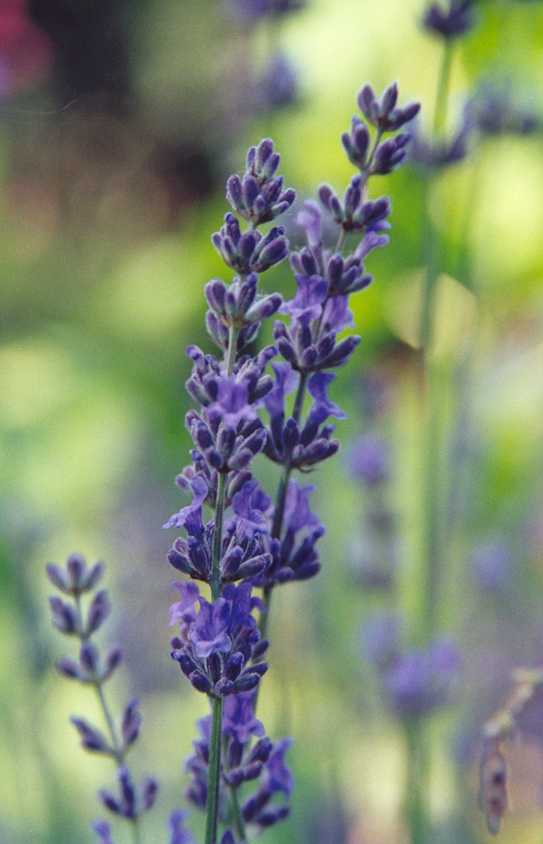
8.29.2010

A Change in the Air

© CND Photography 2010

Happy Sunday all!

After a long weekend for vacation last week, I'm back and feeling refreshed!  It's always really nice to get away for awhile, especially at the end of summer.  It seems like Fall is coming a little early this year to the Pacific Northwest, but I actually welcome it.  There's just something about the season that reminds me to slow down, look inward, and be creative.  

I just launched my Samhain/Halloween line for RedSunflower Designs, and you can view the line here.  For those of you who are unfamiliar with Samhain, it's what we now call Halloween or All Hallows Eve, and is the final of the harvest celebrations celebrated for centuries.  It's a time to think about your ancestors, reflect on what you've accomplished this year, and make goals for the year to come.  It also happens to be one of the more creative times of the year for me, personally.  I always find myself very inspired by change of seasons, and the abundance found in nature at this time.  

This year, I have several blends that I have adapted abit from last year's line up. These are available as lotions, body butters, oils, and even lip balms.  And I still have one top secret product to launch for the line; I'm waiting on one ingredient, which should be here sometime this week.  These will be available until the beginning of November, at which point my holiday line will be coming out.  

I decided to use this week's post as more of an update.  I have several other new products coming out in the next month or so, and I'm really looking forward to getting further and further into the creative process.  Being creative in my daily life is important to me, and a big part of self-expression.  I encourage everyone to use this time at the days get shorter and darker in the coming months to find a way to express yourself creatively, and find something you're passionate about.  Until next week....

Candace

8.15.2010

Reduce, Reuse, Recycle: Finishing Off Unwanted Products


Happy Sunday all!

I hate when I buy a product (shampoo, makeup, etc) and it ends up being not so great, after I've spent all this money on it.  And we all know how hard it can be to take things like that back for a refund.  Also, when you go to the store and forget that one thing, like deodorant or toothpaste.  I could just kick myself when I do this, especially when it's actually ON the list (don't judge me..)!  And it's not just the wasted money aspect, it's the wasted product. I always feel bad throwing things out when we're talking a half full, or more, bottle of shampoo.  So, this week's post is going to have a few tips on how you can find alternate uses for those leftover products, or what to do in a pinch when you forgot to buy something!

  • CONDITIONER 
    • If you have a bottle of conditioner that just isn't working for your hair, but you don't want to just toss it, use it to shave your legs.  I know what you're thinking, but hear me out. It's conditioning, so it's no worse for skin than a regular, mass produced shave gel.  Probably better, actually.
  • SOAP
    • Ya know how you get down to that last little bit of bar soap, and it's so slippery, etc it becomes hard to use?  Alot of times we just end up letting it dissolve and go down the drain, but that's wasteful.  And in this economy, I think we're all watching our pennies!  One way to still get some use out of them is to take those leftover "scraps" of the bar soap, pour some boiling water over, and make liquid soap!  This does work; I've done it.  You could even do this with an entire bar of soap that you've never gotten around to using. Just stir constantly, watching the consistency.
  • SHAMPOO
    • Do a 50/50 mix with your current shampoo or a shampoo you like.  (You could even do 60/40.)  This way, you're using the product, but by mixing it with something you like, you're diminishing the affects you didn't like from the bad shampoo that caused you not to use it in the first place.
  • TOOTHPASTE
    • We've all done it.  You're to the point that you practically have to put the tube in a vice to get anything out, when it happens.  It's gone and you haven't gone to the store.  Here's an effective alternative: Baking soda.  Wet your toothbrush, get alittle of the baking soda on the bristles, and go for it. Baking soda will help to clean your teeth in a natural way.  It won't taste great, but you can also add abit of Scope or other mouthwash if you have it to the toothbrush to "flavor" the baking soda.  
  • LOTION
    • This is actually a two-prong tip!  If you're down to that last bit at the bottom of the bottle and you can't quite get it out, add a bit of water to the bottle, and shake.  This will loosen up the lotion at the bottom of the bottle so you can use it up.  
    • If you're just out of lotion, you can take alittle body oil, massage oil, or even a tiny amount of olive oil, and use this instead.  It's actually really good for your skin, especially when you first get out of the shower and your pores are still open.
  • UNDEREYE SERUM
    • If you're out of your usual depuffing serum or gel for those lovely dark circles, here's an alternative that works almost as well as many over-the-counter solutions.  Keep a bottle of aloe in the refrigerator.  Put a small amount on a Q-tip and apply lightly to the undereye area. 
Most of these are things I wouldn't do every day, but if you're at the last bit of a product, or you need something to get you through a day or two, these are some ideas to try out!

Candace
RedSunflower Designs

8.08.2010

How to get Kissable Lips

Happy Sunday all!

Sorry for my absence last week; it was a holiday for me, and I decided at the last minute to take the day completely off. I hope you've all had a wonderful couple of weeks. 

Maybe it's because I'm leaving on vacation soon, but I feel like my brain may have left already, so I wanted to share something light with everyone today: a DIY Lip Scrub that you can easily make with things most everyone already has in their kitchen.  Here's what you'll need: 

  • 1-2 tbsp brown sugar
  • olive oil (start with about 1/2 - 1 tbsp; you won't need much)
  • a touch of honey
  • a small bowl
  • vanilla
Start by adding the sugar to the bowl, then the olive oil.  Again, start out with a small amount; you can always add later. You're trying to get a standard scrub consistency, but leave alittle for the honey.  Once you have the oil and sugar mixed together, add in the honey.  Honey is an amazing humectant (helps your skin to retain moisture), which all lips really need.  We tend to think our lips won't get as chapped and damaged in the summer, but the sun can be just as harsh as cold temperatures and wind.  Once you have the sugar, honey, and oils mixed to a good consistency, you can add a small amount (think about 3 drops) if you'd like, or my fav: vanilla bean (you could also use a tiny touch of an organic vanilla extract if you prefer.  I always have vanilla beans in my cubard, so I like to squeeze alittle of the fresh vanilla into the scrub; this just gives it a nice "comfort food" feel.  

Once you're ready, rub abit on your lips, rubbing your lips together, etc for maybe 30 seconds (less if your lips are in rough shape).  Rinse off and PAT dry your lips, if anything (you don't want to scrub them dry because this drastically reduces the moisture they retain).  Follow with  a lip balm. You should now have beautiful, kissable lips! This probably will make enough for 2 or 3 uses, if you keep the remaining mixture in the refrigerator and use quickly.  

Now, go kiss somebody ;)!

PS - If you have things you really like to add, let us know!

Candace

7.25.2010

Choices

Happy Sunday all! 

I've been trying to decide what to write about this week ALL MORNING.  Should I do another home beauty recipe?  You're probably getting alittle bored with those, right?  Maybe I should discuss the benefits of a specific essential oil or plant; feels alittle too much like lecturing for my mood.  So I've decided today will be more like a journal entry about me and my life. 

There comes a time when you have to decide what you want out of life; I mean what you really, truly want your life to be.  Then you have to figure out how to make it happen.  Sometimes this means changing directions on your path, or choosing a different path completely.  (I can hear the panic now.  Don't worry, I'm not leaving.) It can be really hard to make the decisions that we know we need to make.  Will things work out if I do this?  Am I making a big mistake?  What if I do X for Y purpose, and it back fires?  

These are thoughts we all have when we realize we are at a crossroads in our life path.  I've recently made a big decision to let one part of my life go in order to pursue the life I truly want.  It was a really hard decision in some ways, but in the end it was a huge relief to have chosen to take that step.  And I'm really happy about my decision.  I won't say I don't have moments of doubt.  Of course, I do.  But I've made the decision that I know is best for me & the direction I want my life to take.  Sometimes you just have to have faith;  faith in yourself, faith in life, and faith in God/the Universe/whatever.  So, I'm taking a big leap to see what the future holds. 

Take a look at your life.  Is there something holding you back that you need to let go of in order to become a better you or to have the life you want?  If so, don't be afraid to make the decisions that will help you get there. 

Natural Blessings, 


Candace

7.18.2010

INHALATIONS: USING ESSENTIAL OILS FOR HEALING

Happy Sunday!

So I've been under the weather for the past couple of days, and it's like a head cold/sinus something or other.  Whenever this happens to me, I always put together an inhalation using essential oils.  And since whatever I had seems to be going around, I thought I'd share with you guys what I personally do!  

So first, you need to get a large bowl (think large mixing bowl; I prefer using a glass bowl), a towel large enough to cover your head (hand towel or larger), boiling water, and your essential oils.  The essential oils to use are: eucalyptus, peppermint, rosemary, and thyme.  Basically, these will not only help to clear up your stuffy head, but help to boost your immune system, which you really need when you're sick. 

Once your water is boiling, take your bowl and put about 5-8 drops of each essential oil into the bottom of the bowl.  Find a place to sit where you can sit (at a table, on the floor, etc) and have the bowl in front of you.  Put the bowl wherever you'll sit, pour the hot water over the essential oils, put the towel over your head and lean over the bowl of hot water.  The hot water hits the essential oils, creating a steam that will loosen everything up, so you'll want to be sure you have tissue next to you.  Be sure you do NOT have your eyes open when leaning over the bowl, as the essential oils can and likely will burn your eyes.  You'll want to sit and inhale deeply over the bowl for 15-20 minutes ideally.  You can either set a timer, or I listen to music. 

You'll feel SO much better after this!  But what if you don't have all of these essential oils? You're not going to go out and spend $30-$40 just to have these if you won't use them for anything else, right?  I actually offer a Cough/Cold blend in my Etsy shop that will allow you to buy them in a slightly diluted form, in a smaller vessel, so you don't have to spend so much money. 

I hope you all find this useful, and here's to breathing through the nose :)!

Natural Blessings - 

Candace

7.11.2010

HOW TO MAKE INFUSED OILS

Happy Sunday!

Ever wondered how to make your own infusions or infused oils?  Today, I'm going to show you a couple of ways to do so.  For this example, I'll be discussing how to make lavender-infused oil.  Please keep in mind that this is an infusion and NOT an essential oil.  You'll need: 
  • lavender buds, fresh or dried
  • jar w/lid, plus another jar or container
  • cheesecloth & rubber band, or a sieve
  • your choice of oil such as olive oil or jojoba
Method #1:
Fill your jar almost completely full (to the shoulder) with the lavender buds. (Hint: If you are using fresh, you will need to press them between some papertowels to get out the excess oil; there's a reason for this, I promise.  Also if you're using fresh, crush them up abit. This will help them release their oils into your carrier oil.)  Top the buds with your oil, filling the jar almost completely full; this limits the amount of air that can get in the jar and will prevent spoilage, etc.  Put the lid on tightly, and store in a warm, dark place for at least a week for maximum scent.  After the appropriate waiting period, remove the lid from the jar.  Either place the cheesecloth taut over the top of the jar, securing with the rubber band, or pour the contents of the jar into the sieve.  Allow the oil to drain into another jar or container; if you use the sieve, press down on the botanicals remaining in the sieve to extract the maximum oil (why waste, right?).   The oil should keep for several months. 

Method #2:
Add your lavender buds and oils to a crockpot.  Here you want to use 1/2 cup of lavender to 1 cup of oil (or close; you can eyeball if you want).  Put it on the absolute lowest setting (you don't want it to get above 100 degrees here), and let it infuse for 2-3 hours.  Remove from heat and let the oil cool completely.  Repeat as above with a sieve, etc.  

You can then use your infusion as a bath oil, moisturizer, in your hair, etc.

You can create an infusion from many flowers and herbs, including:
  • rose
  • mint
  • rosemary
  • sage
  • calendula
Keep in mind that if you are using fresh herbs, it helps to "bruise" them before adding to the infusion, as this will help them to release their natural oils.  Bruising is basically crushing, squeezing, etc the botanical abit (you want to bruise, not kill :).  
Also, it isn't always cheaper for a DIY infusion, depending on your location and what you have access to.  Rose infused oil, for example, can be very expensive, as you always want to be sure to use ORGANIC ONLY.  You don't want pesticides in your infusion. 

I have just launched Lavender Infused Oil in my Etsy shop now, for a limited time only. 

Natural Blessings - 
Candace

7.04.2010

What Exacty is an Absolute?

Happy 4th of July everybody! 

I was recently asked "What is the difference between an essential oil, an absolute, and a fragrance oil?"  Since I already blogged about the difference between essential oils and fragrance oils, I'll focus on absolutes.  

An essential oil is a liquid that is generally distilled (most frequently by steam) from the leaves, stems, flowers, bark, roots, or other elements of a plant. These are oils that are naturally occuring in the plant, often referred to as the plant's essence (thus named "essential oils"). 

Absolute oils are natural oils extracted from flowers, leaves or bark. An absolute oil is not really an essential oil, it is an essence.  They have very high concentrations of fragrance and a little goes a long way.  Absolute oils are also generally more expensive to buy than essential oils, because the process of extraction is more difficult, time consuming, and expensive. 

Here are the "short & sweet" steps of extracting oils for absolutes:

  1. The botanicals are placed in drum together with a solvent mixture, usually alcohol or some other hydrocarbon such as hexane . The solvent is then allowed to be absorbed into the extract. Vacuum distillation is then applied to remove the solvent, leaving behind a material called a concrete or a resin.  Another method is through enfleurage:  The botanicals are placed in fats, allowing the fragrance to be absorbed into the fat over the space of a few days. This process is repeated until the fat is saturated with the desired density of fragrance.
  2. The concrete (or resin) is washed with alcohol to extract the aromatic compounds, after which it is distilled to leave behind the pure essence, the absolute oil.  There is now a new method of absolute oil extraction but it is very expensive - through the use of carbon dioxide. This carbon dioxide acts as a solvent which almost instantaneosly extracts the oil, and because of the low temperature, there is no heat damage to the oil. Due to the expense of this process, however, it is not yet widely used, but is the most natural method of extraction for absolute oils. 
I hope this helps everyone understand the difference between essential oils and absolute oils.  Keep in mind that absolute oils CAN be extracted without the use of chemicals, and you can now find those natural options, especially on the internet.  

Do you have experience working with absolutes?  What are your feelings about them? Let us know.

Candace