Showing posts with label at home spa. Show all posts

10.10.2010

DIY Autumn Skin Care: Raspberry Mint Toner

Happy Sunday all!

There are so many great berries out there that I wanted to keep the theme going for this week! So, today I bring you a Raspberry Mint Toner.  Here's a toner that will not only tighten your pores with the help of mint, which is a natural cleanser with antibacterial properties, but will also be a luscious treat for your nose, with the infusion of raspberries. The berries also add the beneficial antioxidants A & C into the mix, which are good for all skin types.

You'll need: 
* 1/2 cup chopped mint leaves (or two organic mint tea bags)
* 1/4 cup whole raspberries (any variety, rinsed)
* 3 cups water

Combine water & mint (or tea) in a small saucepan. Once the liquid comes to a boil, reduce the heat to a gentle simmer & add the raspberries. Let the mixture simmer for about another four minutes — just until you will smell the strong aroma of raspberries releasing (you don't want to overcook the berries and have them lose their shape). Remove from heat and allow to cool. Strain the liquid into a container.

Use a cotton pad or ball to tone your face liberally after washing, using upward strokes.  Alternately, you can pour the toner into a bottle with a spray top and spritz your skin liberally, allowing the toner to dry before you continue with makeup, moisturizer, etc. 

This mixture will keep for two weeks in the refrigerator.  Or, you can add 5-7 drops of grapefruit seed extract to the mix, shake well, and extend the life of the product to about a month.  Enjoy!

Peace & Natural Blessings - 

Candace

9.26.2010

Facial Cleanser from Grapes? Absolutely!

Happy Sunday all!

As a tribute to my love for a good red wine, this week's DIY Fall Beauty recipe is going to focus on the amazing grape.   So, if your face needs some pep, red grapes can give it an anti-oxidant lift!  

Here's what you'll need:
  • 1 cup mashed grapes (or so; doesn't have to be exact)
  • around 1 tsp olive oil (adjust up or down a smidge depending on skin type)
  • 1/2 tsp baking soda
  • 1/4 cup milk (can be cow, goat, soy, whatever you want)
In a blender, combine the grapes, oil, baking soda and milk, and mix well.  Gently wash your face with this morning and evening. Rinse off with warm water.  

If you refrigerate, this should keep for about a week. 


This is GREAT for your skin because, as we all know, grapes are super high in antioxidants.  The olive oil helps your skin to retain moisture.  Baking soda helps to soften the skin - for that "smooth as a baby's bottom" complexion we all want!  Finally, the enzymes in milk help to gently exfoliate your skin.

I hope you guys have all enjoyed this recipe and found it useful.  Please feel free to comment and let us know how it goes. 

See ya next week :)!

Candace

9.19.2010

FALL SERIES: Apple Body Scrub


Happy Sunday all!

In keeping with the Autumn theme, today we're working with apples!  You can read more about the skin benefits of apple here.  So, let's get on with the recipe for an Apple Body Scrub!

You'll need:
  • a fresh apple
  • salt (preferably himalayan pink salts or dead sea salts)
  • OR sugar
  • oils (jojoba, coconut, grapeseed; whatever your preference is)
  • shea or cocoa butter (if you have it, if not don't worry about it)
  • OPTIONAL: a pinch of cinnamon and/or clove powder
Peel the apple (or not, really doesn't matter too much), and crush the apple until you have what is basically a thick applesauce.  Combine the apple, the salt and/or sugar the shea or cocoa butter (if using) and the oils.  Start with roughly equal parts apple and sugar/salt, add about 1 tbsp of the butter, then add oils 1 tbsp at a time, until you reach the desired consistency.  If you choose to use the cinnamon, you can add that now. Voila! You have a completely natural body scrub.  This should keep in the refrigerator for probably a week or so. 

You can also check out some of my new scrubs & masks at my shop!

I hope you've enjoyed the recipe, and let me know your thoughts on how you're liking this series.

Peace, Love, and Natural Blessings -

Candace

9.12.2010

Pumpkin Face Mask: Fall's Facial!

Happy Sunday all!

Sorry this post is alittle later than usual; I went to the farmer's market earlier, and the bounty was just so good I got kinda carried away.  But I'll be canning and preserving the yumminess throughout the week, so that makes it worth it for me.  But on to the good stuff!


This week starts my series on bath, body, & beauty you can make with our Autumn bounty, things you either already have at home, or can grab up at the farmers market or your local grocer. Today, I'm going to give you a recipe for a Pumpkin Face Mask, so let's get started.

You'll need:
  • 2 tsp canned pumpkin (or you can puree your own fresh pumpkin)
  • 1/2 tsp honey
  • 1/4 tsp milk 

Honey acts as a humectant, which means it helps your skin to retain moisture.  For the milk, you can use any kind you want (cow milk, goats milk, soy, etc) just be sure it's not a flavored milk because that's too much sugar.  The milk, surprisingly, contains acids that help to gently exfoliate your skin.  You can check out last week's post here for the skin benefits of pumpkin. 

Customizations for dry skin: 
1/2 tsp heavy whipping cream instead of milk (high in alpha hydroxy acids)
OR
1/2 tsp brown sugar (instead of milk, to exfoliate)

Customizations for oily skin: 
1/4 tsp apple cider (instead of milk; it's a great toner, hich in alpha hydroxy, and helps to regulate skin's pH level)
OR
1/4 tsp cranberry juice (really high in antioxidants)

I also have a dry formula that will be in my shop by end of day if you prefer something that will last alittle longer, and has more skin-loving ingredients in it.  Click the link below to check it out!

I hope you've found this interesting, and I'll be back next week with another easy, at-home spa recipe.

Lots of love, and enjoy the bounty of the season!

Candace

9.05.2010

How A Visit To Your Local Farmer's Market is Better Than A Trip to Sephora!


Happy Sunday all!  

It's Labor Day weekend, and I know many will have plans.  Family gatherings, a pick-up game of football with friends, maybe getting in that last camping trip of the season...  It's truly a time to go out and appreciate nature and the bounty that this year's harvests have (and will) bring us.  Not only is it sustenance for our bodies, with the shmorgousboard of fruits and veggies available to us, but also for skincare.  I always say that some of the best skincare recipes are those that our great-grandmothers grandmothers used.  Nature gives us most anything we could need, and as my "thank you" to Mother Earth, I thought I'd share the skincare uses of some of the things growing at this time of year!
  • PUMPKIN  contains a wide spectrum of vitamin A derivatives with an outstanding effect on the skin's cellular turnover, meaning you're left with younger-looking skin.  It also contains a multitude of vitamins and minerals with strong antioxidant protection.  The natural fruit acids, along with Vitamins A, C, E, minerals and replenishing enzymes make it a great exfoliant, breakout inhibitor, and pore refiner for your skin. Pumpkin also decreases oxidation and free radical stress in the skin. It is extraordinarily effective for dull, sluggish skin as it stimulates circulation, promotes healing, and provides vitamin nutrition leaving skin glowing and healthy looking. If this isn't enough, it further helps to restore elasticity while allowing ingredients to better penetrate the skin. So, try some pumpkin this fall and use it all year long for radiant, silky smooth skin!
  •  APPLES help treat and control acne breakouts to improving your complexion.  Applying the fruit to your face as a mask gives your skin a healthy dose of Vitamin A, B, C and E. This will act as a gentle face scrub and will clean your pores from deep within!  If you suffer from acne, apple cider vinegar is a must.  Soak a cotton ball in the vinegar and then apply lightly over your face and neck (I'd start with alittle and go from there; you want to test your skin first, as anyone can have allergies to anything). Let it stay on a few minutes then wash off with warm water.  This will help to get rid of impurities, as well as excess oil on your skin.  
  • BERRIES contain ellagic acid, an antioxidant found in numerous fruits, vegetables and nuts, (but especially raspberries, strawberries, cranberries and pomegranates), which can protect the skin against UV damage.  Strawberries in particular are high in alpha-hydroxy acid, a great little substance that helps us slough off dead skin cells so that new, youthful skin is revealed.  It's also a natural exfoliant, as are all berries. Berries also help the body to manufacture collagen, which helps keep the skin looking supple, smooth & wrinkle-free. 
  • GRAPES are full of antioxidants, reservatrol (found in the skin of the grape), and are very nourishing for your skin.  Grapes can be used as a tonic, and are wonderful for mature or dehydrated skin. 
  • AND FINALLY...  Masks of peaches and tomatoes are excellent for oily skin care for removing grease and to shrink pores. 
This is going to be the start of a new series! Through October, I'll be featuring a home spa recipe using these and other ingredients you can easily find at your local farmers market, etc during this time of year!  I hope everyone enjoys it, and finds this series useful. 

Wishing everyone a wonderful, restful Labor Day weekend!

Candace 

8.15.2010

Reduce, Reuse, Recycle: Finishing Off Unwanted Products


Happy Sunday all!

I hate when I buy a product (shampoo, makeup, etc) and it ends up being not so great, after I've spent all this money on it.  And we all know how hard it can be to take things like that back for a refund.  Also, when you go to the store and forget that one thing, like deodorant or toothpaste.  I could just kick myself when I do this, especially when it's actually ON the list (don't judge me..)!  And it's not just the wasted money aspect, it's the wasted product. I always feel bad throwing things out when we're talking a half full, or more, bottle of shampoo.  So, this week's post is going to have a few tips on how you can find alternate uses for those leftover products, or what to do in a pinch when you forgot to buy something!

  • CONDITIONER 
    • If you have a bottle of conditioner that just isn't working for your hair, but you don't want to just toss it, use it to shave your legs.  I know what you're thinking, but hear me out. It's conditioning, so it's no worse for skin than a regular, mass produced shave gel.  Probably better, actually.
  • SOAP
    • Ya know how you get down to that last little bit of bar soap, and it's so slippery, etc it becomes hard to use?  Alot of times we just end up letting it dissolve and go down the drain, but that's wasteful.  And in this economy, I think we're all watching our pennies!  One way to still get some use out of them is to take those leftover "scraps" of the bar soap, pour some boiling water over, and make liquid soap!  This does work; I've done it.  You could even do this with an entire bar of soap that you've never gotten around to using. Just stir constantly, watching the consistency.
  • SHAMPOO
    • Do a 50/50 mix with your current shampoo or a shampoo you like.  (You could even do 60/40.)  This way, you're using the product, but by mixing it with something you like, you're diminishing the affects you didn't like from the bad shampoo that caused you not to use it in the first place.
  • TOOTHPASTE
    • We've all done it.  You're to the point that you practically have to put the tube in a vice to get anything out, when it happens.  It's gone and you haven't gone to the store.  Here's an effective alternative: Baking soda.  Wet your toothbrush, get alittle of the baking soda on the bristles, and go for it. Baking soda will help to clean your teeth in a natural way.  It won't taste great, but you can also add abit of Scope or other mouthwash if you have it to the toothbrush to "flavor" the baking soda.  
  • LOTION
    • This is actually a two-prong tip!  If you're down to that last bit at the bottom of the bottle and you can't quite get it out, add a bit of water to the bottle, and shake.  This will loosen up the lotion at the bottom of the bottle so you can use it up.  
    • If you're just out of lotion, you can take alittle body oil, massage oil, or even a tiny amount of olive oil, and use this instead.  It's actually really good for your skin, especially when you first get out of the shower and your pores are still open.
  • UNDEREYE SERUM
    • If you're out of your usual depuffing serum or gel for those lovely dark circles, here's an alternative that works almost as well as many over-the-counter solutions.  Keep a bottle of aloe in the refrigerator.  Put a small amount on a Q-tip and apply lightly to the undereye area. 
Most of these are things I wouldn't do every day, but if you're at the last bit of a product, or you need something to get you through a day or two, these are some ideas to try out!

Candace
RedSunflower Designs

8.08.2010

How to get Kissable Lips

Happy Sunday all!

Sorry for my absence last week; it was a holiday for me, and I decided at the last minute to take the day completely off. I hope you've all had a wonderful couple of weeks. 

Maybe it's because I'm leaving on vacation soon, but I feel like my brain may have left already, so I wanted to share something light with everyone today: a DIY Lip Scrub that you can easily make with things most everyone already has in their kitchen.  Here's what you'll need: 

  • 1-2 tbsp brown sugar
  • olive oil (start with about 1/2 - 1 tbsp; you won't need much)
  • a touch of honey
  • a small bowl
  • vanilla
Start by adding the sugar to the bowl, then the olive oil.  Again, start out with a small amount; you can always add later. You're trying to get a standard scrub consistency, but leave alittle for the honey.  Once you have the oil and sugar mixed together, add in the honey.  Honey is an amazing humectant (helps your skin to retain moisture), which all lips really need.  We tend to think our lips won't get as chapped and damaged in the summer, but the sun can be just as harsh as cold temperatures and wind.  Once you have the sugar, honey, and oils mixed to a good consistency, you can add a small amount (think about 3 drops) if you'd like, or my fav: vanilla bean (you could also use a tiny touch of an organic vanilla extract if you prefer.  I always have vanilla beans in my cubard, so I like to squeeze alittle of the fresh vanilla into the scrub; this just gives it a nice "comfort food" feel.  

Once you're ready, rub abit on your lips, rubbing your lips together, etc for maybe 30 seconds (less if your lips are in rough shape).  Rinse off and PAT dry your lips, if anything (you don't want to scrub them dry because this drastically reduces the moisture they retain).  Follow with  a lip balm. You should now have beautiful, kissable lips! This probably will make enough for 2 or 3 uses, if you keep the remaining mixture in the refrigerator and use quickly.  

Now, go kiss somebody ;)!

PS - If you have things you really like to add, let us know!

Candace

7.11.2010

HOW TO MAKE INFUSED OILS

Happy Sunday!

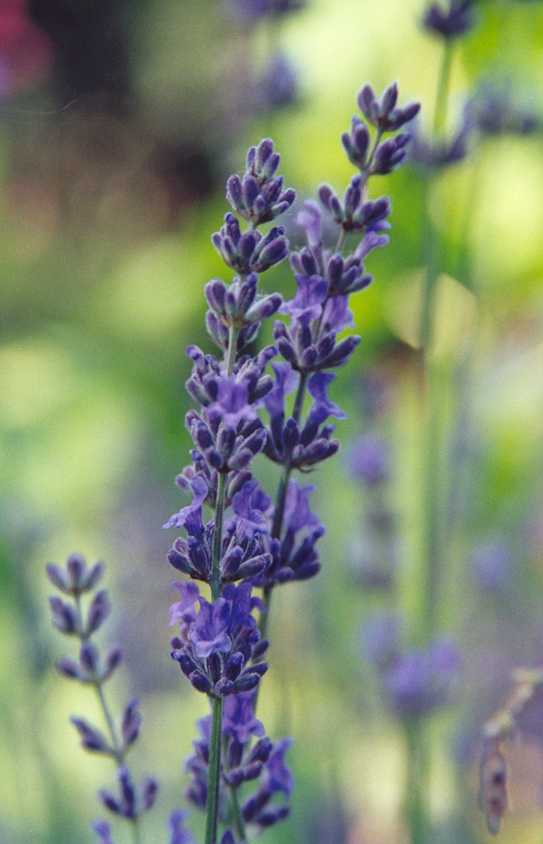
Ever wondered how to make your own infusions or infused oils?  Today, I'm going to show you a couple of ways to do so.  For this example, I'll be discussing how to make lavender-infused oil.  Please keep in mind that this is an infusion and NOT an essential oil.  You'll need: 
  • lavender buds, fresh or dried
  • jar w/lid, plus another jar or container
  • cheesecloth & rubber band, or a sieve
  • your choice of oil such as olive oil or jojoba
Method #1:
Fill your jar almost completely full (to the shoulder) with the lavender buds. (Hint: If you are using fresh, you will need to press them between some papertowels to get out the excess oil; there's a reason for this, I promise.  Also if you're using fresh, crush them up abit. This will help them release their oils into your carrier oil.)  Top the buds with your oil, filling the jar almost completely full; this limits the amount of air that can get in the jar and will prevent spoilage, etc.  Put the lid on tightly, and store in a warm, dark place for at least a week for maximum scent.  After the appropriate waiting period, remove the lid from the jar.  Either place the cheesecloth taut over the top of the jar, securing with the rubber band, or pour the contents of the jar into the sieve.  Allow the oil to drain into another jar or container; if you use the sieve, press down on the botanicals remaining in the sieve to extract the maximum oil (why waste, right?).   The oil should keep for several months. 

Method #2:
Add your lavender buds and oils to a crockpot.  Here you want to use 1/2 cup of lavender to 1 cup of oil (or close; you can eyeball if you want).  Put it on the absolute lowest setting (you don't want it to get above 100 degrees here), and let it infuse for 2-3 hours.  Remove from heat and let the oil cool completely.  Repeat as above with a sieve, etc.  

You can then use your infusion as a bath oil, moisturizer, in your hair, etc.

You can create an infusion from many flowers and herbs, including:
  • rose
  • mint
  • rosemary
  • sage
  • calendula
Keep in mind that if you are using fresh herbs, it helps to "bruise" them before adding to the infusion, as this will help them to release their natural oils.  Bruising is basically crushing, squeezing, etc the botanical abit (you want to bruise, not kill :).  
Also, it isn't always cheaper for a DIY infusion, depending on your location and what you have access to.  Rose infused oil, for example, can be very expensive, as you always want to be sure to use ORGANIC ONLY.  You don't want pesticides in your infusion. 

I have just launched Lavender Infused Oil in my Etsy shop now, for a limited time only. 

Natural Blessings - 
Candace

7.04.2010

What Exacty is an Absolute?

Happy 4th of July everybody! 

I was recently asked "What is the difference between an essential oil, an absolute, and a fragrance oil?"  Since I already blogged about the difference between essential oils and fragrance oils, I'll focus on absolutes.  

An essential oil is a liquid that is generally distilled (most frequently by steam) from the leaves, stems, flowers, bark, roots, or other elements of a plant. These are oils that are naturally occuring in the plant, often referred to as the plant's essence (thus named "essential oils"). 

Absolute oils are natural oils extracted from flowers, leaves or bark. An absolute oil is not really an essential oil, it is an essence.  They have very high concentrations of fragrance and a little goes a long way.  Absolute oils are also generally more expensive to buy than essential oils, because the process of extraction is more difficult, time consuming, and expensive. 

Here are the "short & sweet" steps of extracting oils for absolutes:

  1. The botanicals are placed in drum together with a solvent mixture, usually alcohol or some other hydrocarbon such as hexane . The solvent is then allowed to be absorbed into the extract. Vacuum distillation is then applied to remove the solvent, leaving behind a material called a concrete or a resin.  Another method is through enfleurage:  The botanicals are placed in fats, allowing the fragrance to be absorbed into the fat over the space of a few days. This process is repeated until the fat is saturated with the desired density of fragrance.
  2. The concrete (or resin) is washed with alcohol to extract the aromatic compounds, after which it is distilled to leave behind the pure essence, the absolute oil.  There is now a new method of absolute oil extraction but it is very expensive - through the use of carbon dioxide. This carbon dioxide acts as a solvent which almost instantaneosly extracts the oil, and because of the low temperature, there is no heat damage to the oil. Due to the expense of this process, however, it is not yet widely used, but is the most natural method of extraction for absolute oils. 
I hope this helps everyone understand the difference between essential oils and absolute oils.  Keep in mind that absolute oils CAN be extracted without the use of chemicals, and you can now find those natural options, especially on the internet.  

Do you have experience working with absolutes?  What are your feelings about them? Let us know.

Candace 

6.27.2010

Make a Facial Scrub In Your Own Kitchen!

Happy Sunday everyone!  I hope everyone's out enjoying the sun & heat.  I don't want to take up your entire day, so today is another DIY recipe.  I thought I would give you a basic recipe for a facial (& body) scrub you can make simply with the ingredients you have in your kitchen.  So read on and enjoy!

You'll need:

  • 3-4 tbsp Brown sugar
  • 2 -4 tbsp of some kind of oil (you can use olive, etc but I recommend grapeseed if you have it)
  • 3-4 tbsp Oatmeal
  • 1/2 tsp honey
  • Botanicals (optional)
  • Essential oils (not necessary)
Take about 3-4 tablespoons of brown sugar, the oil (start with 2 tbsp or so, then add from there as needed), and honey, & combine in a small bowl.  Grind about 4tbsp oatmeal in a food processor or blender, and add this to the bowl.  You can now add any essential oils and/or botanicals you'd like.  Some people like to grind up alittle lavender or rose petals to add to it.  Tip: Vanilla essential oil (if you have it) is a great addition.  Very warm and comforting.   That's it!  Just mix to your desired consistency, then use as  gentle and completely natural scrub!  This recipe is enough for 1-2 uses as a facial scrub. 

Do you like when I give you recipes like this?  Is it helpful?  Let me know. Until next week..

Peace, Love, & Natural Blessings,

Candace

5.02.2010

Spa Quality Pedicures at Home!

Happy Sunday everyone!

I LOVE pedicures!  They are so relaxing and enjoyable; it's a nice way to just get away from real life, so to speak.  But to get a pedicure in a salon can be really expensive, and sometimes you don't really feel like you get what you paid for (okay, alot).  So I started doing pedicures at home a few years back.  I've tinkered with the formula for a foot soak, exfoliants, etc, and was finally able to come up with the perfect concoctions.

If you're familiar with my product line, you probably already know that I'm talking about my Sole Food spa line.  The Foot Bath has a combination of epsom salts & Dead Sea Salts for healing, raw cane sugar for gentle exfoliation, & powdered goat's milk to soften and hydrate the skin.  Locally-grown lavender buds make you feel like you're at a spa in Provence, and a potion of lavender, tea tree, and peppermint essential oils will help to revive and revitalize your tired, cracked feet while quieting your mind.  All you do is put 1-2 tablespoons of this mixture into your foot bath, and soak your feet for 10-15 minutes (longer if you like).

I follow this up with the Sole Food Foot Cream, made from a combination of mango & shea butter, and lots of skin-loving oils to make you feel really pampered.  I carried the theme through with the lavender/tea tree/peppermint essential oils. 

This essential oil combination is perfect for any pedicure because:
  • Tea tree oil is anti-fungal, anti-bacterial, anti-everything!  Its perfect for cleansing. 
  • Peppermint oil makes you feel refreshed, which helps give those tired feet a revitalizing pick-me-up.
  • Lavender oil is the ultimate in relaxing the mind, body, and soul. 
 Why pay to go to the spa when you can bring the spa to you ;)?

Candace
RedSunflower Designs
Visit my shop!